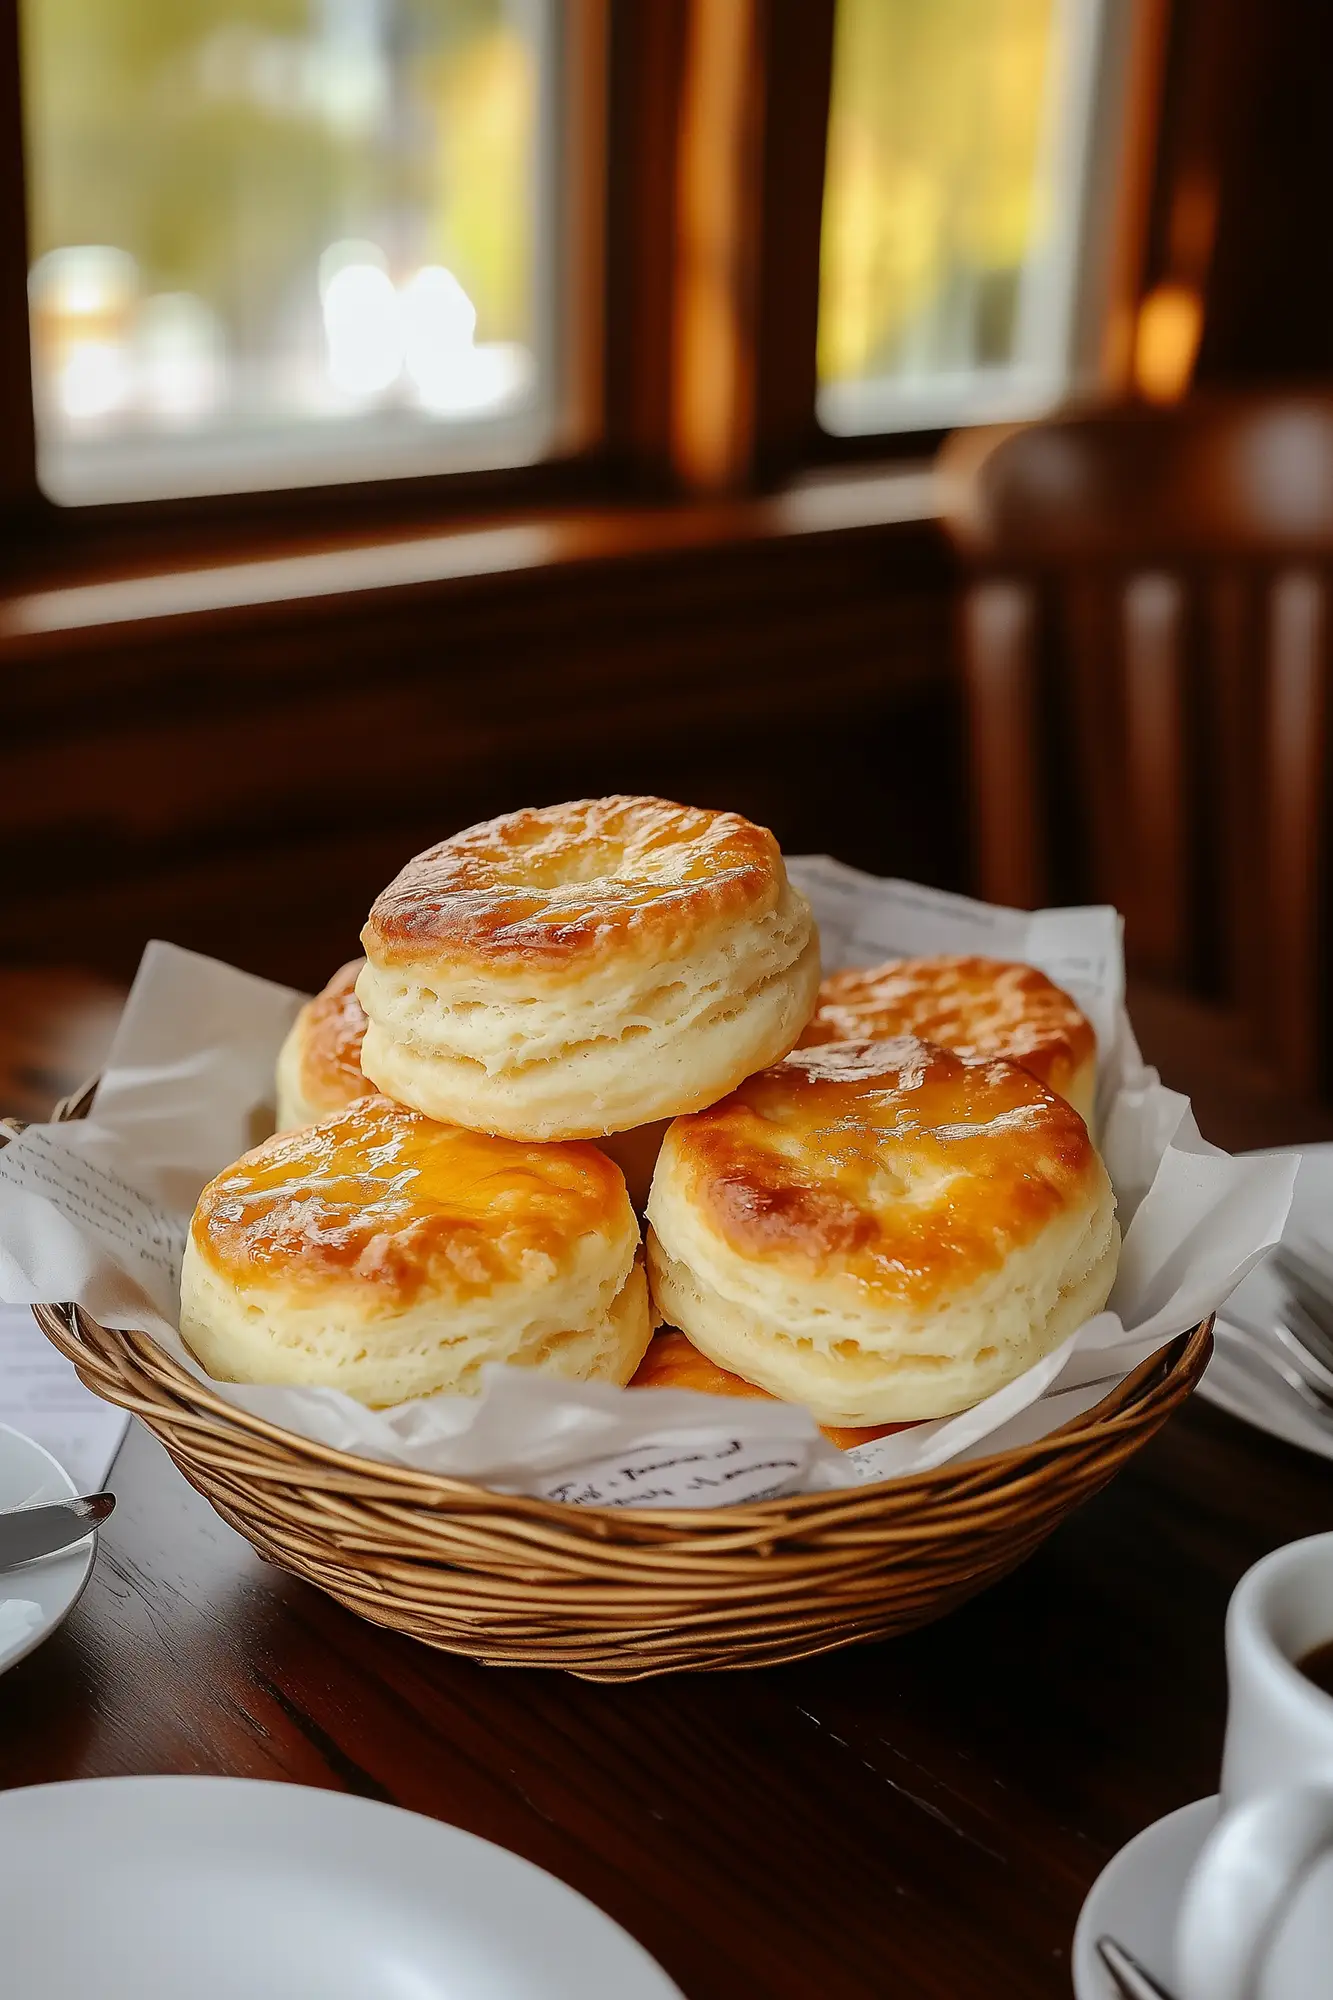
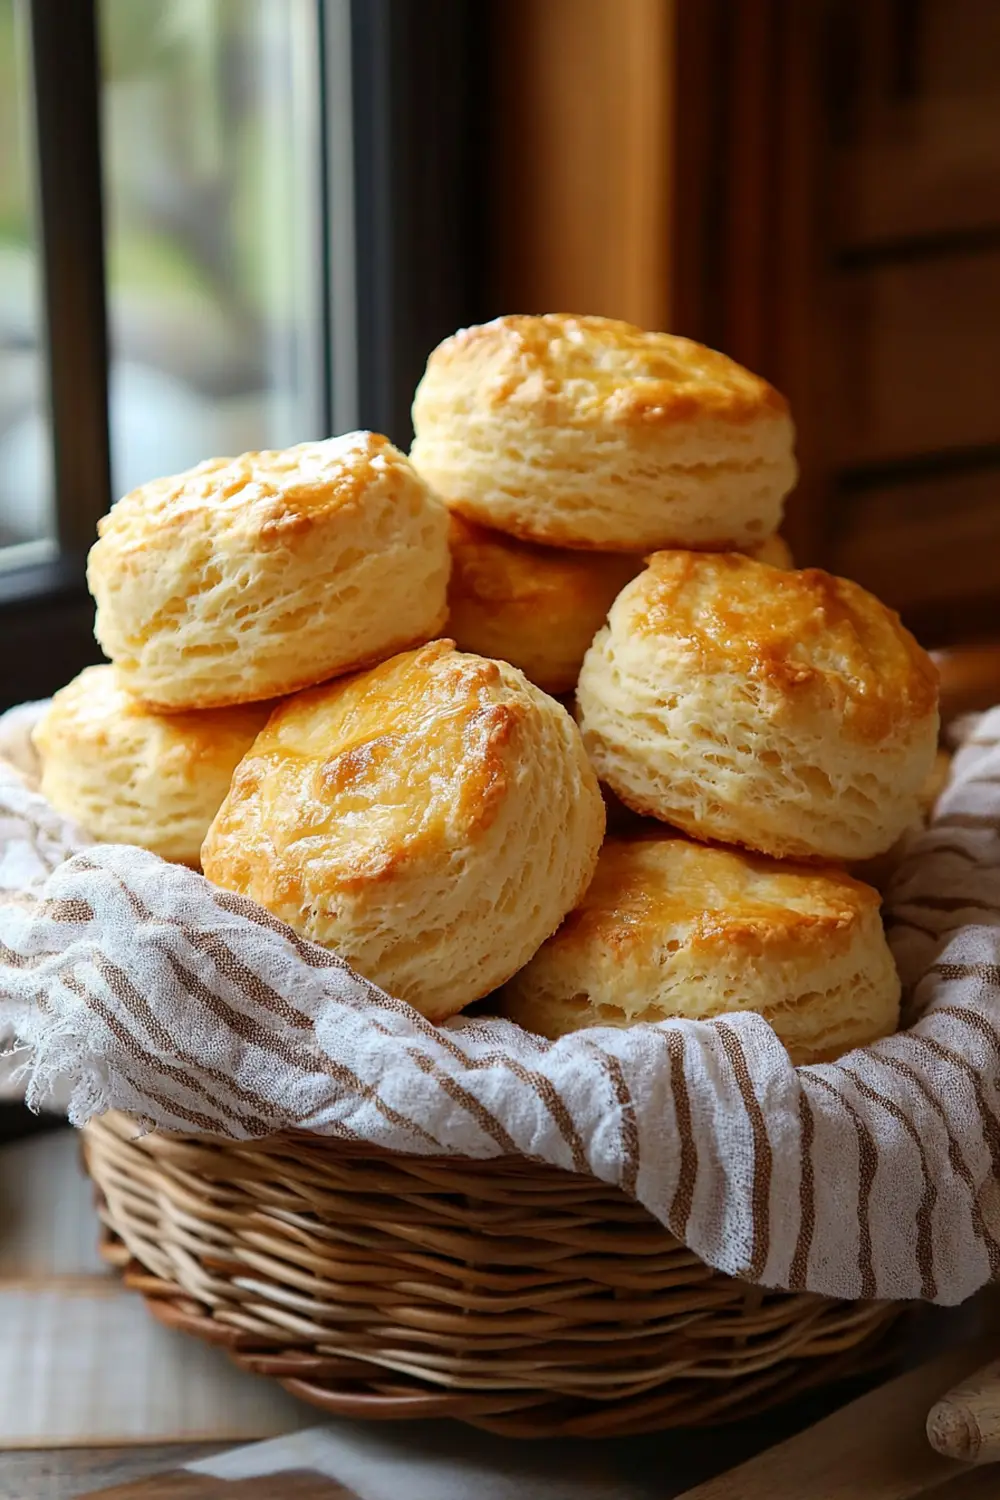
Try the flaky, buttery goodness of homemade honey butter biscuits. They’re a Southern favorite that warms your heart and awakens your senses. Made with honey, these biscuits carry the sweet taste of tradition from the American South.
Making these biscuits might seem hard, but it’s easy with the right steps and ingredients. They’re perfect for anyone, from beginners to experts. These biscuits will make your family love them, bringing a taste of Southern charm to your table.
Key Takeaways
- Homemade honey butter biscuits are a quintessential Southern delicacy with a rich, flaky, and buttery texture.
- The recipe reflects the culinary heritage and traditions of the American South, passed down through generations.
- Baking these biscuits from scratch is easier than it may seem, with the right ingredients and techniques.
- These biscuits are a comforting and versatile breakfast, brunch, or snack option that can be enjoyed by all.
- Following the step-by-step instructions in this article will help you achieve perfect, golden-brown biscuits every time.
The Southern Heritage of Honey Butter
Honey butter biscuits, like their buttermilk cousins, are a delicious reflection of the American South’s rich culinary traditions. Rooted in the region’s love for warm, comforting flavors, they are a sweet twist on a timeless classic.
Origins in the American South
Born from the humble buttermilk biscuit, honey butter biscuits embrace the South’s heritage of simple, wholesome cooking. Their ingredients—staples in Southern kitchens—capture the essence of rustic, home-cooked charm.
Evolution of Traditional Recipes
Over time, this classic evolved with the addition of honey and butter, turning a savory staple into a lightly sweet indulgence. This adaptation reflects the South’s knack for blending tradition with innovation, creating recipes that feel both familiar and exciting.
Cultural Significance
More than a biscuit, honey butter biscuits symbolize Southern hospitality and the joy of sharing food with loved ones. They bring people together, whether at family gatherings or Sunday brunch, offering a taste of warmth and connection.
“Honey butter biscuits are a sweet reflection of Southern cuisine, a humble yet delightful twist on a staple that brings people together and celebrates the warmth and culinary creativity of the American South.”
Essential Ingredients for Perfect Honey Butter Biscuits
Making delicious honey butter biscuits starts with the right ingredients. Each part, from the soft texture to the sweet flavor, is crucial. Let’s look at what makes these biscuits special.
All-Purpose Flour
All-purpose flour is the base of a great biscuit. It’s light and tender, making it perfect. Make sure to measure it right, as too much can make the biscuit dry.
Buttermilk
Buttermilk is key to biscuit success. It adds a tangy taste and softens the dough. Choose fresh, quality buttermilk for the best biscuits.
Baking Powder
Baking powder makes biscuits light and fluffy. It mixes with wet ingredients to create air pockets. This makes the biscuit airy and soft.
Unsalted Butter
Butter is the star of biscuits. It adds a rich flavor and soft texture. Use cold, unsalted butter for the best taste and texture.
Honey
Quality honey is needed for the honey butter. It balances the biscuit’s savory taste with sweetness. The honey’s flavor enhances the biscuit’s taste.
With these ingredients, you’re ready to make delicious honey butter biscuits. They’ll make everyone want more.
| Ingredient | Amount | Purpose |
|---|---|---|
| All-purpose flour | 2 cups | Provides structure and texture |
| Buttermilk | 3/4 cup | Adds tenderness and tangy flavor |
| Baking powder | 1 tablespoon | Leavening agent for rise and fluffiness |
| Unsalted butter | 6 tablespoons | Contributes rich, buttery taste and flakiness |
| Honey | 2 tablespoons | Sweetens the biscuits and creates the honey butter |
Kitchen Tools and Equipment You’ll Need
Making perfect homemade honey butter biscuits starts with the right tools. A sturdy baking sheet or sheet pan is essential for baking, while a pastry cutter or fork is perfect for blending butter into the dry ingredients. Mixing bowls of various sizes will keep your preparation organized, and a biscuit cutter (or the rim of a glass) ensures even, round shapes. For rolling out the dough, a rolling pin comes in handy.
Optional Equipment for Better Results
Optional tools can take your biscuit-making to the next level. A food processor provides a quick way to cut butter into flour evenly, and a stand mixer with a paddle attachment can save you time when mixing the dough. If precision is your style, a kitchen scale is perfect for accurate measurements.
Measuring Essentials
Accurate measuring tools are non-negotiable. Dry measuring cups for flour and sugar, liquid measuring cups for buttermilk, and a set of measuring spoons for salt and baking powder ensure every ingredient is just right. With these essentials, your biscuit-making journey will be smooth and enjoyable.
With the right tools and equipment, you’ll make perfect homemade honey butter biscuits every time. Now, let’s get into the step-by-step dough preparation process.
Step-by-Step Biscuit Dough Preparation
Making the perfect homemade biscuit dough is key to creating those flaky, golden honey butter biscuits. Follow these steps, and you’ll master the art of biscuit-making in no time.
Mixing the Biscuit Dough
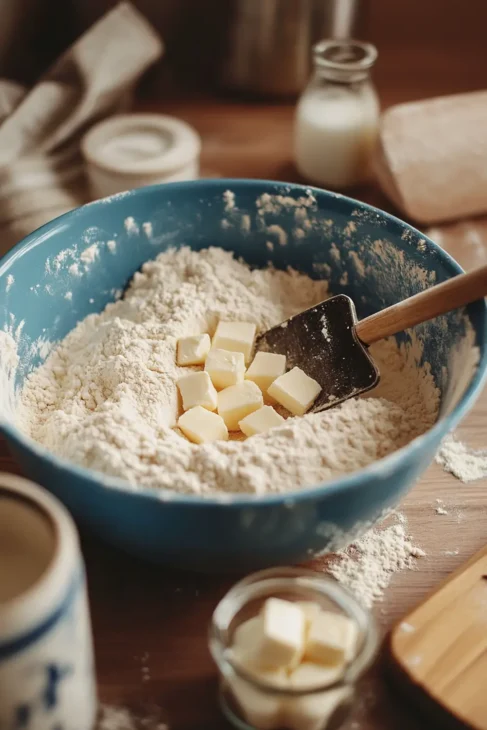
Start by gathering your dry ingredients—flour, baking powder, and salt—and whisk them together in a large mixing bowl. This ensures an even distribution of the leavening agents. Next, add cold, cubed butter to the mix. Using a pastry cutter or your fingers, blend the butter into the flour until the mixture resembles coarse crumbs. The cold butter is essential for creating those signature flaky layers.
Kneading and Folding
Slowly pour in the cold buttermilk, gently mixing until a shaggy dough forms. Transfer the dough to a lightly floured surface, being careful not to overmix. Knead it just enough to bring everything together, about 4-6 turns.
After bringing your biscuit dough together, it’s time to create those irresistibly flaky layers. This process may seem simple, but it’s one of the secrets to achieving biscuits with the perfect texture.
Lightly Dust the Surface: Sprinkle a small amount of flour on your work surface to prevent sticking, but don’t overdo it—too much flour can dry out the dough.
Flatten and Shape: Using your hands or a rolling pin, gently press or roll the dough into a rectangle about ¾-inch thick. Don’t press too hard; you want to keep the dough light and airy.
First Fold: Mentally divide the rectangle into thirds. Fold one third of the dough over the middle section, as if folding a letter. Then fold the remaining third over the top, creating a neat stack of dough.
Turn and Repeat: Rotate the dough 90 degrees, and gently flatten it back out to its original rectangle shape. Repeat the folding process two or three more times. This layering technique helps create the buttery, flaky texture that makes biscuits so irresistible.
Mind the Pressure: Always handle the dough with care. Use just enough pressure to shape and fold, but not so much that you compress it. Overworking the dough at this stage can result in dense biscuits instead of light, flaky ones.
Final Thickness: After the last fold, roll or press the dough to your desired thickness—usually about 1 inch for tall, fluffy biscuits.
Chill if Needed: If your kitchen is warm or the dough feels too soft, place it in the fridge for 10-15 minutes. Keeping the butter cold is key to achieving those lovely pockets of steam during baking.
This gentle stretching and folding process is a game-changer. With each fold, you’re building layers of butter and dough that will separate beautifully in the oven. Trust the process, and you’ll be rewarded with biscuits that are as visually stunning as they are delicious.
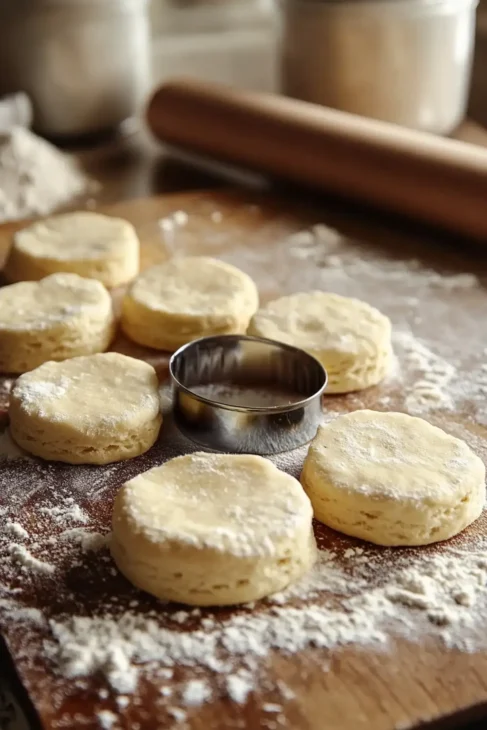
Cutting the Biscuits
Using a sharp biscuit cutter or the rim of a drinking glass, cut the dough into rounds. Press straight down without twisting—twisting seals the edges and can prevent the biscuits from rising properly. Place the biscuits on a parchment-lined baking sheet, either touching for softer sides or spaced apart for crispier edges.
By following these simple steps, you’ll be well on your way to biscuit dough perfection. Remember, the key is to handle the dough gently and avoid overworking it, which can make biscuits tough and dense. With a little practice, you’ll be a biscuit dough master in no time!
Tips for Biscuit Dough
- Keep it Cold: Cold butter and buttermilk are non-negotiable for fluffy, flaky biscuits. If your kitchen is warm, pop the butter and even the mixing bowl into the fridge for a few minutes before starting.
- Light Hands: Handle the dough as little as possible. Overworking it can lead to tough biscuits.
- Use What You Have: If you don’t have a biscuit cutter, a sharp-edged glass works perfectly. Just avoid twisting while cutting!
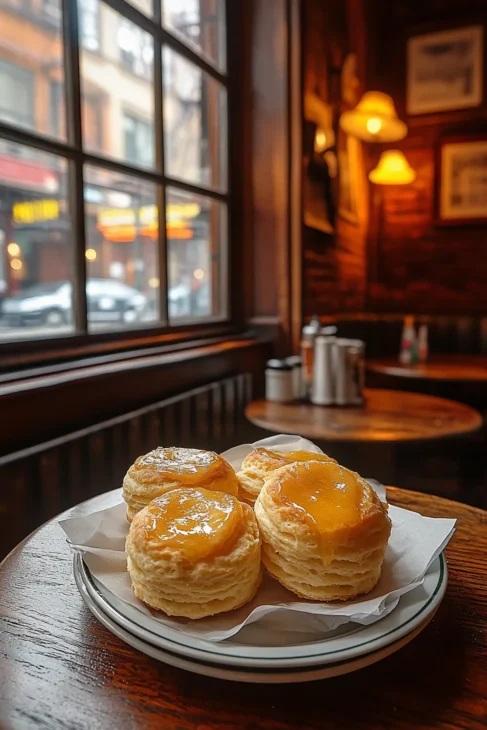
Mastering the Art of Honey Butter Mixture
A good honey butter mixture takes your biscuits from delicious to unforgettable. It’s all about using quality ingredients and the right techniques to create a smooth, creamy spread. Let’s break it down step by step.
Selecting the Right Honey
The honey you choose will set the tone for your honey butter’s flavor. High-quality honey, like raw wildflower or clover honey, adds depth and richness. For an elevated touch, experiment with orange blossom honey or lavender-infused honey. These varieties pair beautifully with the buttery base and complement the biscuits’ flaky texture.
Butter Temperature Tips
Getting the butter’s temperature just right is essential for a smooth, creamy honey butter:
- Use softened butter at room temperature for the best texture and ease of mixing.
- Avoid melting the butter, as this can result in a greasy and separated mixture.
- If your butter is too cold, let it sit out for 15-20 minutes. This prevents a lumpy or uneven texture when mixing.
Mixing Techniques
Begin by beating the softened butter until it’s light and fluffy. This step incorporates air, giving the honey butter a whipped, luxurious texture. Gradually add the honey, mixing thoroughly after each addition. For an even creamier consistency, use a hand or stand mixer with the paddle attachment. Want a truly whipped butter experience? Increase the mixing speed to add more air for that light, cloud-like finish.
Tips for Honey Butter
- Personalize the Flavor: Add a pinch of sea salt for balance or a dash of cinnamon for a cozy, spiced twist.
- Quality Counts: The better the honey, the better the butter. Local raw honey often has the richest flavor.
- Make It Ahead: Whip up your honey butter a day in advance. The flavors meld beautifully after resting overnight.
“The perfect honey butter is the secret to elevating your homemade biscuits to new heights of flavor and enjoyment.”
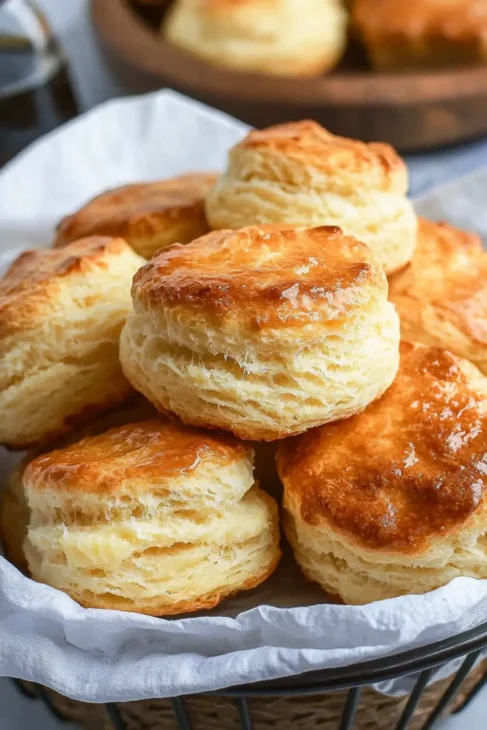
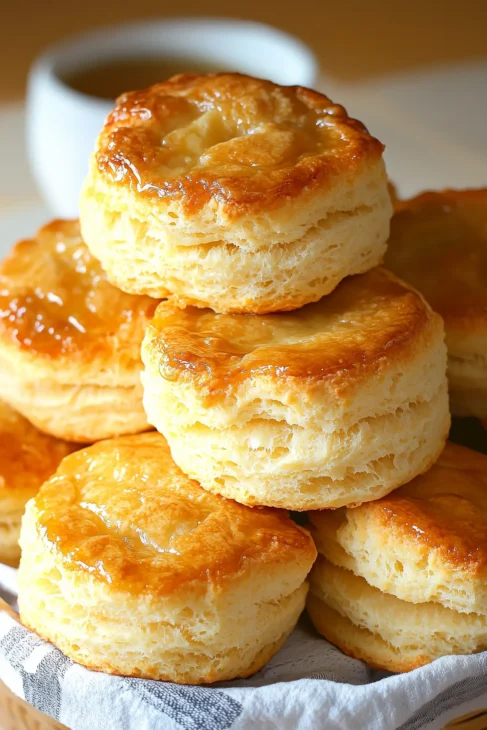
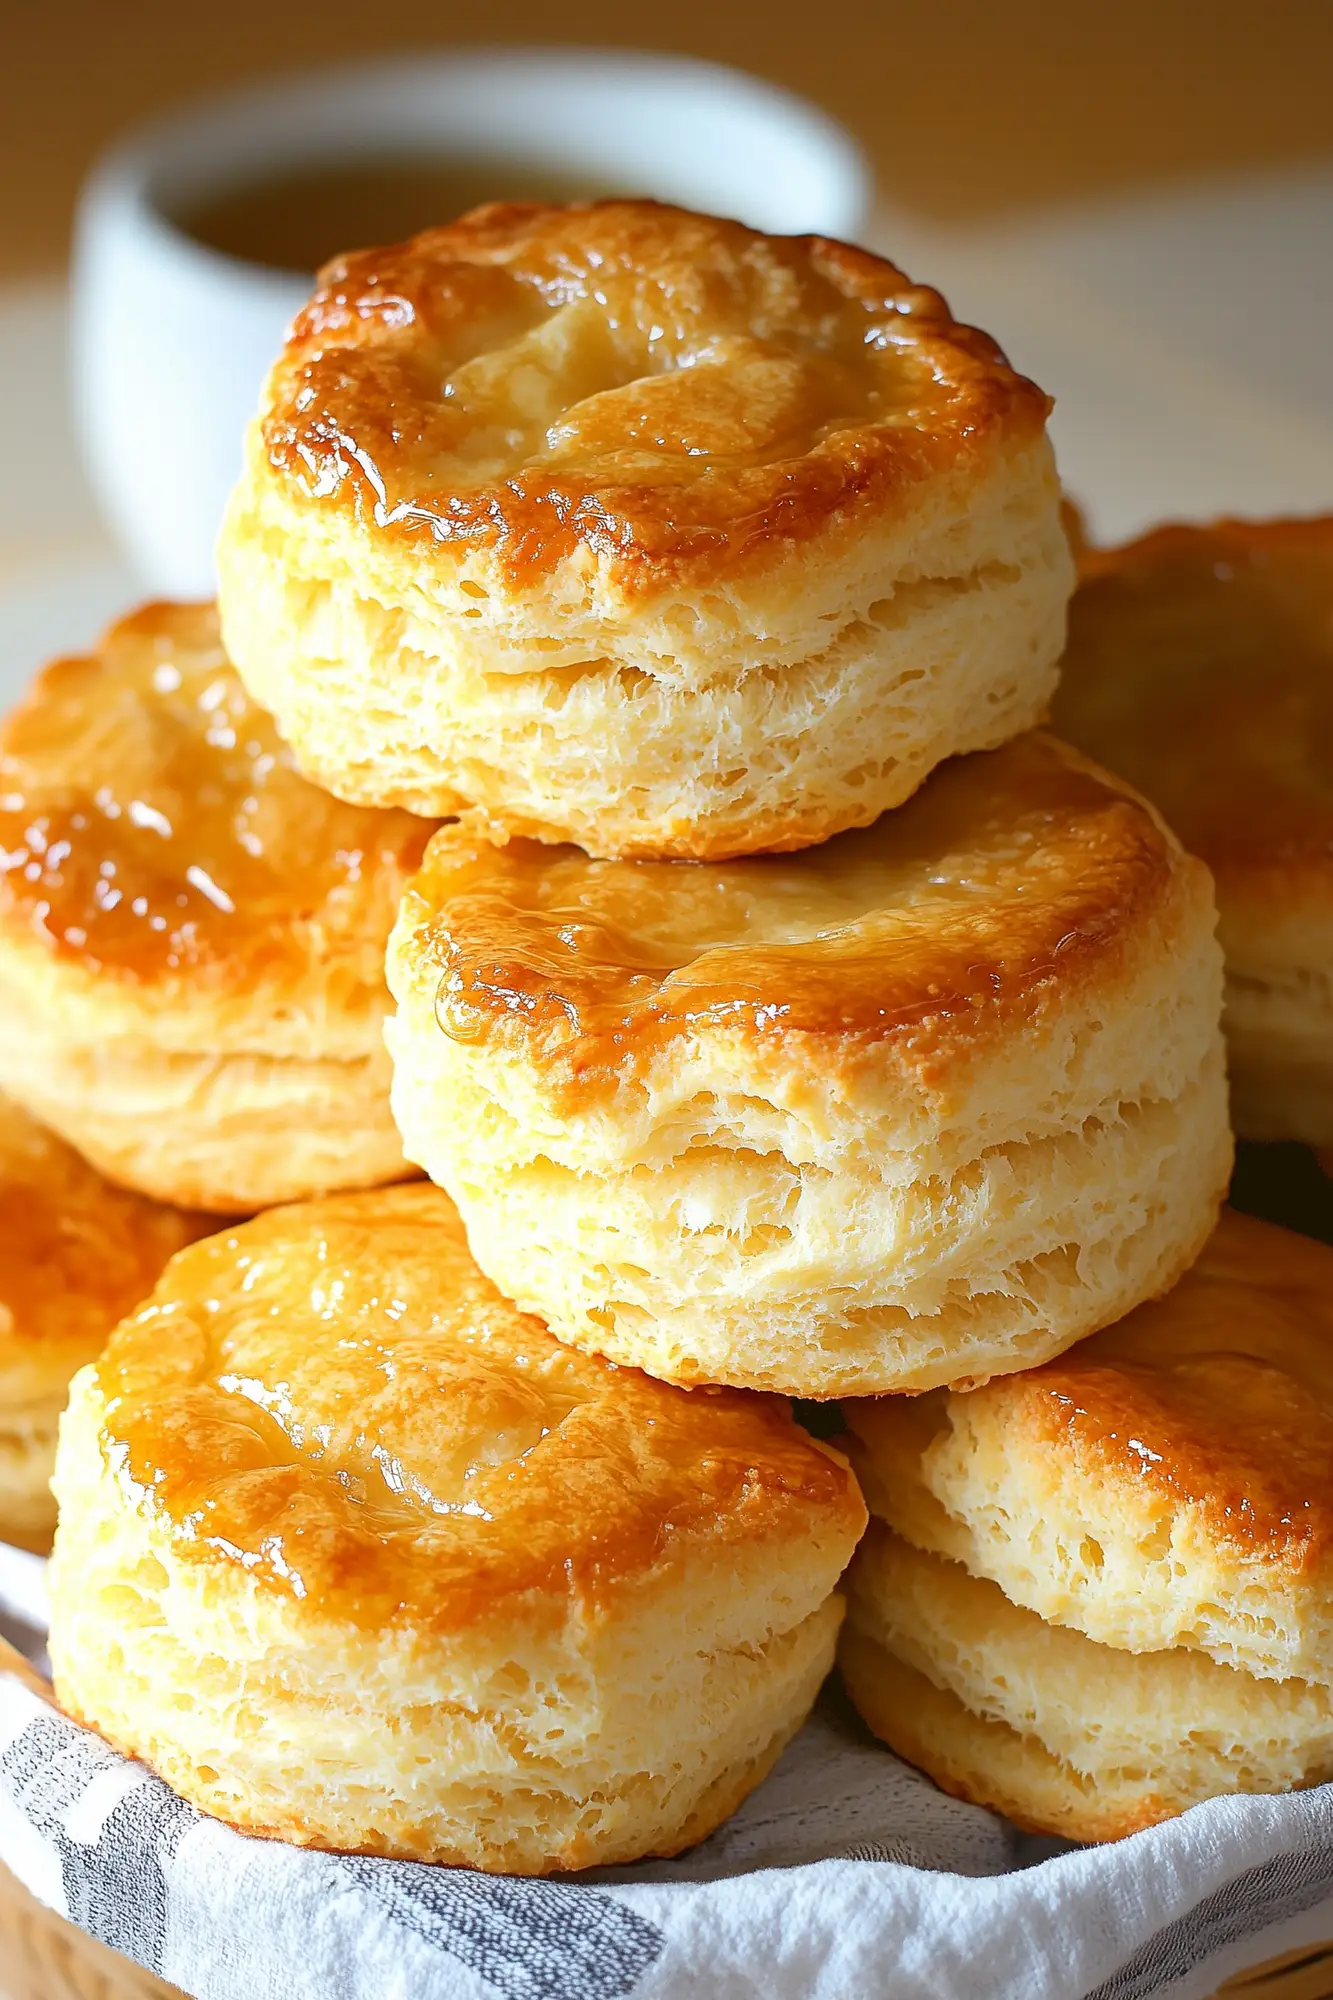
Baking Techniques for Golden-Brown Results
Achieving that perfect golden-brown crust on homemade biscuits is both an art and a science. With just a few simple adjustments, you can bake biscuits that are light, fluffy, and visually stunning. Let’s break it down.
Oven Temperature is Key
The secret to a beautifully baked biscuit is the oven temperature. Preheat your oven to a hot 450°F (232°C). This high heat makes the outside crispy while keeping the inside light and flaky.
Timing is Everything
Keep a close eye on your biscuits while they bake. Generally, 12-15 minutes is the sweet spot. The tops should be golden, and the bottoms should have a light toastiness. Watch carefully in the last few minutes to avoid overbaking, as it can dry out the dough.
Visual Cues for Doneness
Trust your eyes as much as the timer. Look for these signs to know when your biscuits are just right:
- Golden Hue: The tops should be a warm, golden-brown.
- Crisp Edges: Slightly cracked tops indicate a flaky texture.
- Spring Test: A gentle press on the biscuit top should spring back lightly.
Remember, overbaking can make biscuits dry and tough. So, watch the clock and look for those visual cues.
Tip:
If your biscuits bake unevenly, try rotating the tray halfway through. This ensures even browning, especially in ovens with hot spots.
With these baking techniques, you’ll achieve golden-brown, bakery-quality biscuits every time. The aroma alone will have everyone gathering in the kitchen!
“Baking is like washing dishes, you just have to get used to it. It’s not a natural thing – it’s learned.”
– Ina Garten
With the right oven temperature and baking time, you’ll make those golden-brown crust biscuits. Everyone will want the recipe.
Serving and Storage Suggestions
Enjoying your homemade honey butter biscuits is just as fun as baking them. They’re great for family meals or fancy brunches. Here are some ideas to serve and keep them fresh.
Presentation Ideas
Present your biscuits in a rustic basket or on a wooden board for a cozy look. For something fancier, use a platter and add fresh herbs or honey. Serving them warm from the oven adds a wonderful aroma that everyone will love.
Proper Storage Methods
Keeping your biscuits fresh is important. Cool them down and store them in an airtight container at room temperature for up to two days. This keeps them soft and tasty. For longer storage, the fridge is your friend for up to a week.
Reheating Tips
To make your biscuits feel like new, just reheat them. Try a 350°F oven for 5-7 minutes or a quick microwave with a damp paper towel for 10-15 seconds. This brings back their soft, flaky texture.
With these tips, your honey butter biscuits will always be a hit. They’re perfect for sharing with your family and friends.
| Serving Suggestions | Storage Methods | Reheating Techniques |
|---|---|---|
|
|
|
Common Mistakes to Avoid When Making Biscuits
Baking homemade biscuits is an art that can occasionally trip up even the most experienced baker. But with a little guidance, these common pitfalls are easy to avoid. Let’s explore some biscuit-making challenges and how to overcome them for consistently flaky and tender results.
Overworking the Dough
One of the easiest mistakes is handling the dough too much. Overmixing or kneading can overdevelop the gluten, resulting in dense and tough biscuits. Instead, work the dough just until it comes together—light hands make for light biscuits. Keep folding minimal and gentle to maintain those lovely layers.
Tip: Treat the dough like a delicate friend—firm enough to guide but gentle enough to respect its limits.
Incorrect Ingredient Temperatures
The temperature of your ingredients can make or break your biscuits. Butter that’s too warm won’t create the steam pockets needed for flakiness, while milk or buttermilk that’s too cold can hinder proper mixing. Aim for cold butter and slightly chilled buttermilk to achieve that perfect balance.
Tip: Cube your butter and refrigerate it while you prep the dry ingredients. Cold butter = flaky magic.
Improper Baking Time and Temperature
Even the best-prepared dough won’t shine if the oven isn’t set just right. Baking at too low a temperature will result in pale, under-risen biscuits, while too high can burn the tops before the centers bake through. A preheated oven at 450°F (232°C) is ideal.
Keep an eye on the biscuits in the final minutes—golden tops and springy centers signal they’re done. Overbaking will dry them out, so don’t be tempted to leave them in “just a little longer.”
Tip: Set a timer, but also trust your eyes and nose—the scent of golden-brown perfection is your best guide.
With these tips, you’ll sidestep the most common biscuit mishaps and turn out a batch that’s flaky, tender, and utterly irresistible. Mistakes are simply part of the learning curve, so enjoy the process and know that every biscuit is a step toward mastery.
Conclusion
Homemade honey butter biscuits are a timeless celebration of comfort and flavor. They carry with them the warmth of tradition and the simple joy of gathering around the table. Each step in making them—from mixing the dough to savoring that first buttery bite—is a moment of connection and creativity.
Whether you’re baking for a special occasion or just because, these biscuits bring a sense of satisfaction that goes beyond their delicious taste. With a little practice and a touch of your own personality in the recipe, they’ll quickly become a favorite in your kitchen.
So preheat the oven, let the rich aroma fill your home, and enjoy the process of creating something truly delightful to share with the ones you love.
FAQ
What are the key ingredients for making homemade honey butter biscuits?
To make homemade honey butter biscuits, you need a few key ingredients. These include all-purpose flour, baking powder, and salt. You’ll also need unsalted butter, buttermilk, and honey.
What kitchen tools and equipment are needed for baking biscuits?
You’ll need some basic baking tools. These include a pastry cutter, biscuit cutter, and a baking sheet. You’ll also need mixing bowls. Optional tools like a food processor can help improve your results.
How do I prepare the biscuit dough properly?
Preparing the biscuit dough is key. First, mix the dry ingredients. Then, cut in the cold butter. Finally, gently fold in the buttermilk until a shaggy dough forms. Remember, don’t overwork the dough for the flakiest texture.
What’s the secret to making the perfect honey butter mixture?
Making great honey butter is all about the details. Choose the right honey and make sure the butter is at the right temperature. Use the right mixing techniques to get a smooth, spreadable consistency.
How can I achieve a golden-brown biscuit crust?
For a golden-brown crust, bake the biscuits at the right temperature. Keep an eye on the baking time and watch for visual cues like color and rising.
How should I store and reheat leftover biscuits?
Store leftover biscuits in an airtight container at room temperature for up to 3 days. To reheat, place them on a baking sheet in a 350°F oven for 5-10 minutes. This will warm them through and make them crisp again.
What are some common mistakes to avoid when making biscuits?
Avoid common mistakes like overworking the dough and using ingredients at the wrong temperature. Also, don’t overbake. Stick to the recipe and pay attention to your techniques to avoid these mistakes.
Honey Butter Biscuits
Equipment
- Large mixing bowl
- Whisk
- Pastry cutter or fork
- Biscuit cutter or sharp-edged glass
- Baking sheet
- Parchment paper
- Rolling pin (optional)
- Small bowl
- Measuring cups and spoons
Ingredients
Biscuits:
- 2 cups all-purpose flour—Provides structure and texture.
- 1 tablespoon baking powder—Leavening agent for rise and fluffiness.
- 1/2 teaspoon salt—Enhances overall flavor.
- 6 tablespoons unsalted butter cold, cubed—Creates flaky, buttery layers.
- 3/4 cup buttermilk cold—Adds tanginess and moisture.
Honey Butter:
- 2 tablespoons honey—Provides sweetness and richness.
- 4 tablespoons unsalted butter softened—Forms the creamy, smooth base.
Instructions
Biscuit Dough:
- Preheat the oven to 450°F (232°C) and line a baking sheet with parchment paper.
- In a large bowl, whisk together flour, baking powder, and salt.
- Add the cold, cubed butter to the dry ingredients and cut it in using a pastry cutter or fingers until the mixture resembles coarse crumbs.
- Gradually stir in the buttermilk until a shaggy dough forms. Avoid overmixing.
- Transfer the dough to a lightly floured surface, knead gently 4-6 times, and fold into thirds 2-3 times for flaky layers.
- Roll or press the dough to a 1-inch thickness and cut rounds with a biscuit cutter, pressing straight down without twisting.
- Arrange biscuits on the baking sheet and bake for 12-15 minutes, or until golden-brown.
Honey Butter:
- In a small bowl, beat softened butter until light and fluffy.
- Gradually mix in honey until smooth. Adjust sweetness to taste.
- Spread honey butter on warm biscuits and enjoy.
Notes
To keep the butter cold, refrigerate the dough briefly if your kitchen is warm.
Leftover biscuits can be stored in an airtight container for up to 2 days at room temperature or up to 1 week in the fridge.
Reheat biscuits in a 350°F oven for 5-7 minutes or microwave with a damp paper towel for 10-15 seconds.